HOW TO - Import pdf bank statement CSV to QuickBooks
Step by step to convert your bank statement and import to quickbooks
Sep 8, 2023 | Read time 7 minutes
📗 Table of contents
Introduction
In this post I will go over how you can convert your bank statement PDF file to a CSV that can be imported into QuickBooks.
Previously I had to show a client how to import a CSV of bank transactions to QuickBooks and there are a few steps involved.
Generally the steps are summarized as:
- Download your bank statement PDF
- Extract the PDF to CSV using PdfDodo
- Prepare CSV for QuickBooks
- Import CSV into QuickBooks
1. Download your bank statement
This step depends on your bank. Usually just go to your bank’s website and download the relevant statement.
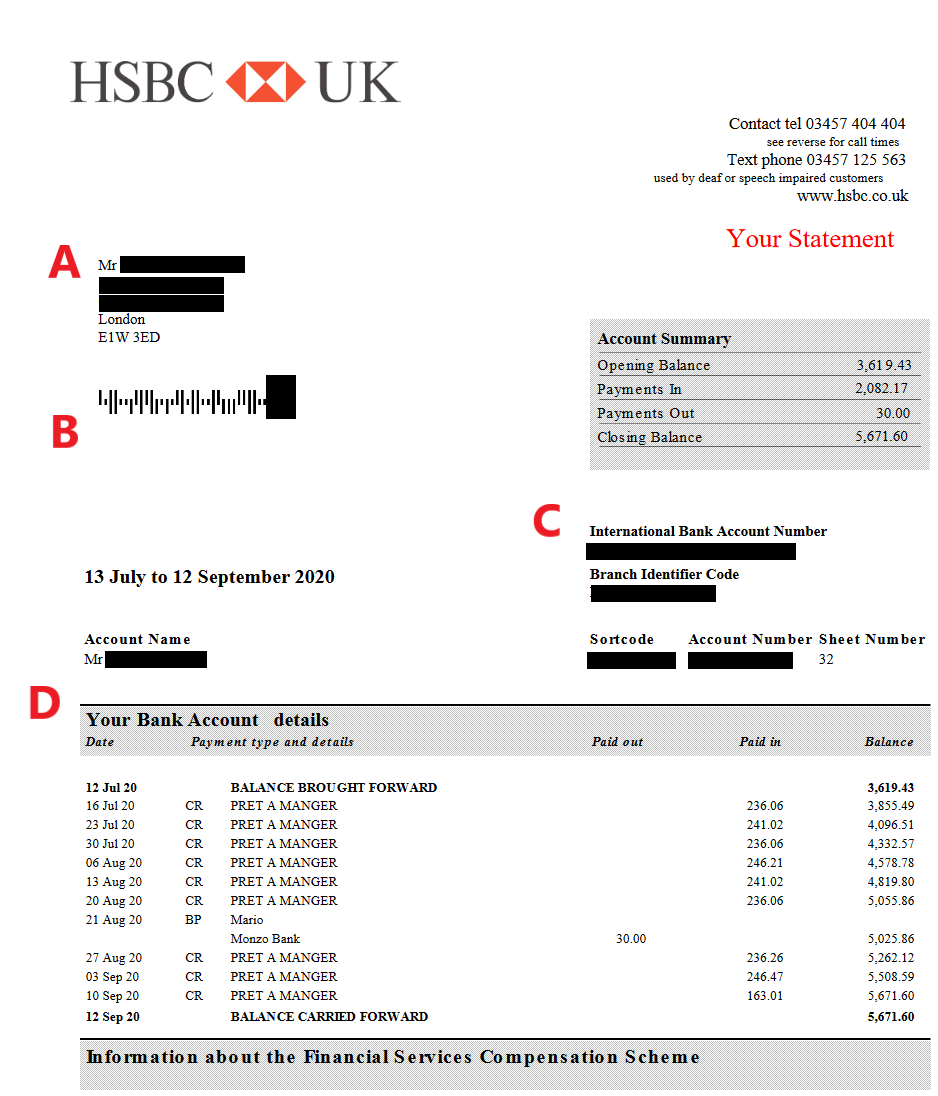
In this example I will use HSBC bank statements.
2. 👉 Extracting the data from PDF
After you have got your PDF bank statement, we can go to PDFDodo and extract the data into CSV format.
To do start the CSV conversion, we go through the following steps:
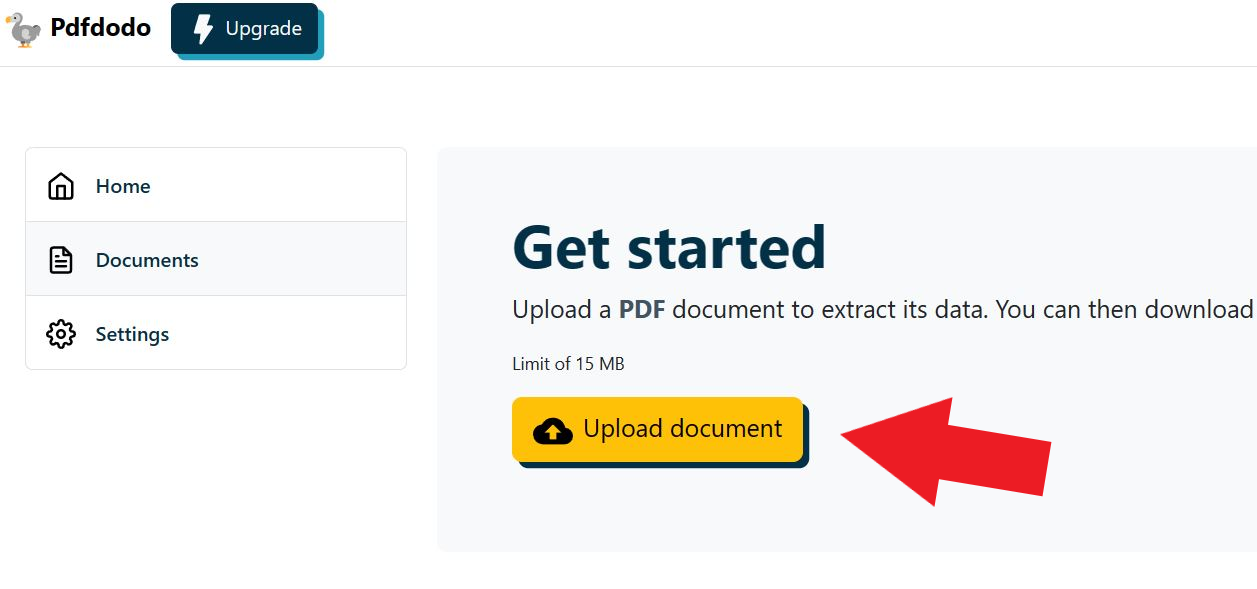
- Step 1: Get an account with PdfDodo
- Step 2: Go to the home page and click “Upload Document”
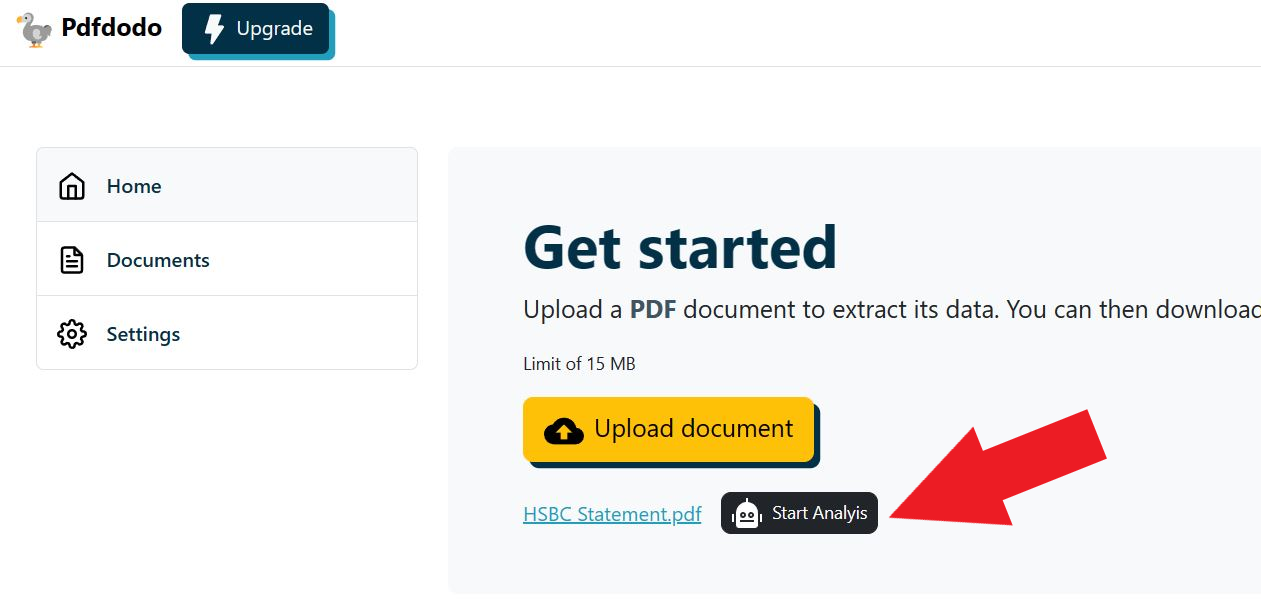
- Step 3: After the document has uploaded - click “Start Analysis”. This will usually take a few seconds.
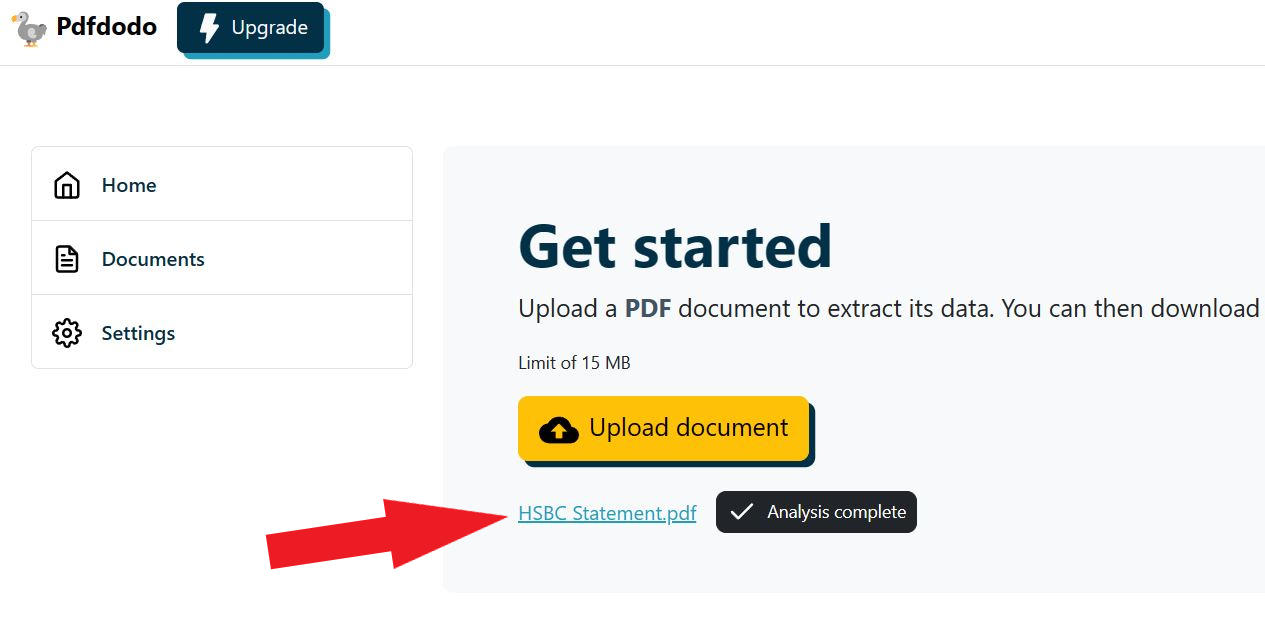
- Step 4: Click on the uploaded document link to see the results.
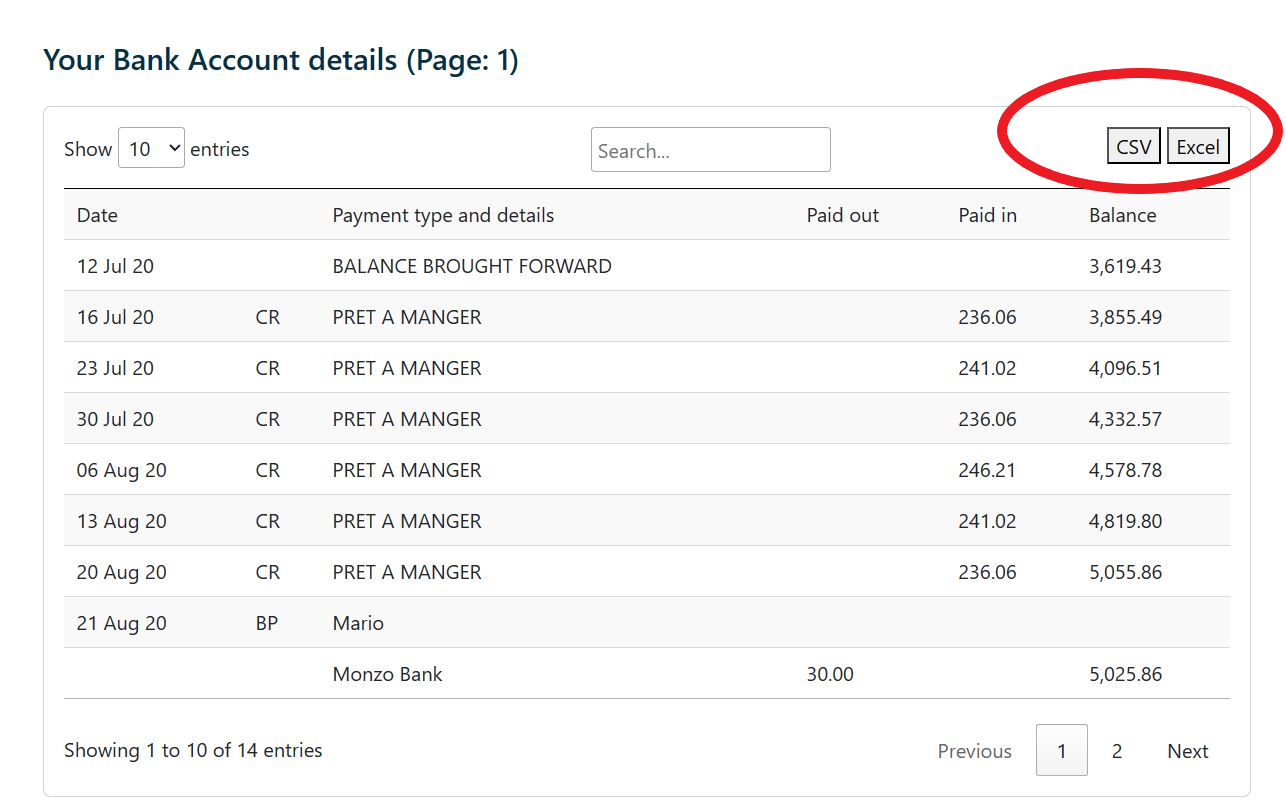
After PdfDodo has completed analysis, it will list out all the data that it thinks is in a table format.
Now we can see our result and download the Excel or CSV file:
A note on CSVs
CSV, which stands for “Comma-Separated Values,” is a simple and widely-used file format that’s used to store tabular data (like a spreadsheet or database). Here’s a breakdown of the CSV format:
By default, fields are separated by commas, which is where the format gets its name. However, sometimes other delimiters like semicolons are used, especially in regions where the comma is used as a decimal separator.
Each line in a CSV file corresponds to a row in the table. As for columns - values on the same line, separated by commas, correspond to different columns
Consider the following table:
Name Age Occupation John Doe 30 Engineer Jane Doe 28 Doctor The above table would look like this in CSV format:
  Name,Age,Occupation
  John Doe,30,Engineer
  Jane Doe,28,Doctor
3. Prepare CSV for QuickBooks
The next step is to convert our CSV file to a format that it understands.
The CSVs should be formatted to 3 columns or 4 columns structure.
With 3-column structure, we have to have the columns: “Date”, “Description” and “Amount”. The columns will have to be in that order.
An example is as below:
| A | B | C | |
|---|---|---|---|
| 1 | Date | Description | Amount |
| 2 | 1/1/2018 | Example of a payment | -100.00 |
| 3 | 1/1/2018 | Example of a deposit | 200.00 |
For the 4-column structure that QuickBooks understands, you will need to have the columns: “Date”, “Description”, “Credit”, “Debit”
| A | B | C | D | |
|---|---|---|---|---|
| 1 | Date | Description | Credit | Debit |
| 2 | 1/1/2018 | Example of a payment | 100.00 | |
| 3 | 1/1/2018 | Example of a deposit | 200.00 |
For our example, we will use HSBC bank statements. Looking at the transactions table, we can see it we will need to fix up a few things:
- Date column to have correct format
- Update the column names
- Remove the payment type column
Date column to have correct format
Open the CSV in Excel and right click one of the date columns. Click “Format Cell” and then select the format that is "dd/mm/yyyy"
Update the column names
Update the “Payment Type and details” column to “Description”.
Additionally, update the “Paid in” column to “Credit” and the “Paid out” to “Debit”.
Finally remove the “Balance” column since this is not needed by Quickbooks.
Remove the payment type column
QuickBooks does not have a column for “Payment Type” so we will need to remove this column.
4. Import into QuickBooks
- Go to Bookkeeping, select Transactions, then select Bank transactions (Take me there).
- Select Upload transactions.
- Select Drag and drop or select files and then select the file you downloaded from your bank. Then select Continue.
- In the QuickBooks account ▼ dropdown, select the account you want to upload the transactions into. Then select Continue.
Tip: If you’re new to QuickBooks, you may not have an account to upload the transactions into. If you don’t see one, select Add New ▼ from the dropdown to connect a new bank account.
- Follow the onscreen steps to match the columns on the file with the correct fields in QuickBooks. Then select Continue.
- Select the transactions you would like to import. Then select Continue.
- Select Yes.
- When you’ve accepted your transactions, select Done.
Tips to make your import smooth
- Eliminate all zeroes (0) from the file, leaving those cells empty.
- Correct any entries where numbers appear in the Description column.
- In the column headers for “Credit” and “Debit,” remove the term “amount” to retain just “Credit” and “Debit.”
- Ensure consistency in date format, adhering to the dd/mm/yyyy convention.
- If you’re using a Mac, save the file as a Windows CSV file.
For banks that include weekdays in the Date column (like 20/11/2018 TUE), remove the weekday following these steps:
- Open the CSV file with Microsoft Excel.
- Select the column containing the date.
- Navigate to “Data,” then choose “Text to Columns.”
- Adhere to the on-screen instructions, specifying:
- Original data type: Delimited
- Delimiters: Space
- Column data format: General
Dealing with Credit Card account
CSV files associated with credit card accounts might present transactions in an inverted manner.
For instance, deposits could be represented as negative values because making payments on your credit card diminishes your outstanding balance.
To guarantee the proper importation of these transactions into QuickBooks Online, it’s imperative to choose the matching credit card account (rather than a banking account) while uploading the file.
Summary
In this post I went over how you can convert your PDF bank statement to CSV and then import it into QuickBooks.
Firstly, you will need to extract the PDF bank statement to CSV. We can do this using PdfDodo.
Next you will need to clean the data and structure your CSV into a format that QuickBooks understands.
Quickbooks accepts 3 columns and 4 columns structure for CSVs.
After all of that, we can then import the statement into Quickbooks.
👋 About the Author
G'day! I am Ken Ito a software engineer based in Australia. I have worked as a software engineer for more than 10 years ranging from roles such as tech lead, data analyst to individual contributor. I have experience in creating code (python, javascript) to extract data from PDFs for ETL and financial statement analysis for accounting purposes.
During those years, I have worked for Government departments, companies like NTT (Nippon Telegraph and Telephone), Bupa and not-for-profit organizations.
HOW TO - Convert Wells Fargo Bank Statement to Excel
Sep 7, 2023Best ways to convert Wells Fargo Bank Statement to Excel format
[HOW TO] Convert Standard Bank Statement to Excel
Sep 5, 2023Step by step instructions on converting Standard bank statements to Excel
[RESOLVED] Export NatWest Bank Statement to Excel
Sep 7, 2023Your guide to exporting NatWest Bank statement to Excel or CSV